
티스토리 뷰
Repository:https://github.com/lhs9602/fe-sprint-auth-oauth
GitHub에서 OAuth 등록
- https://github.com/settings/developers에서 new OAuth App를 클릭.
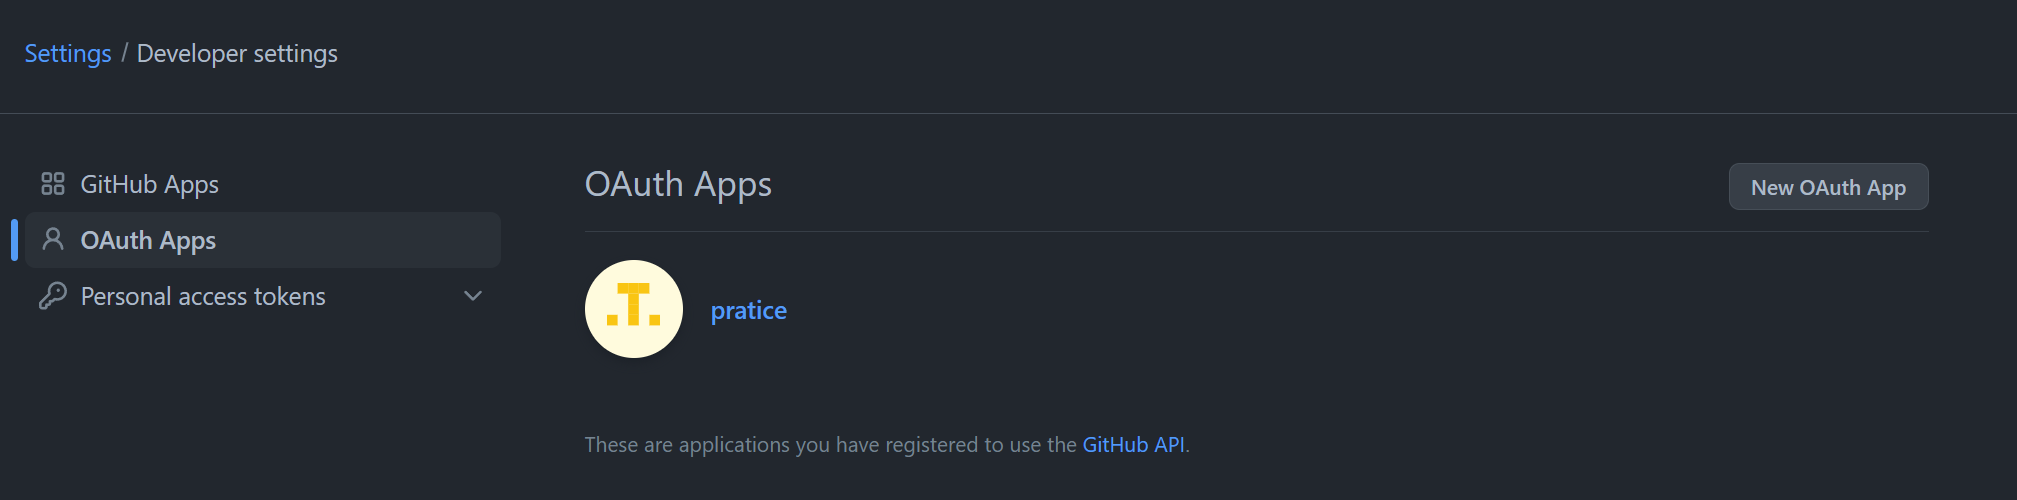
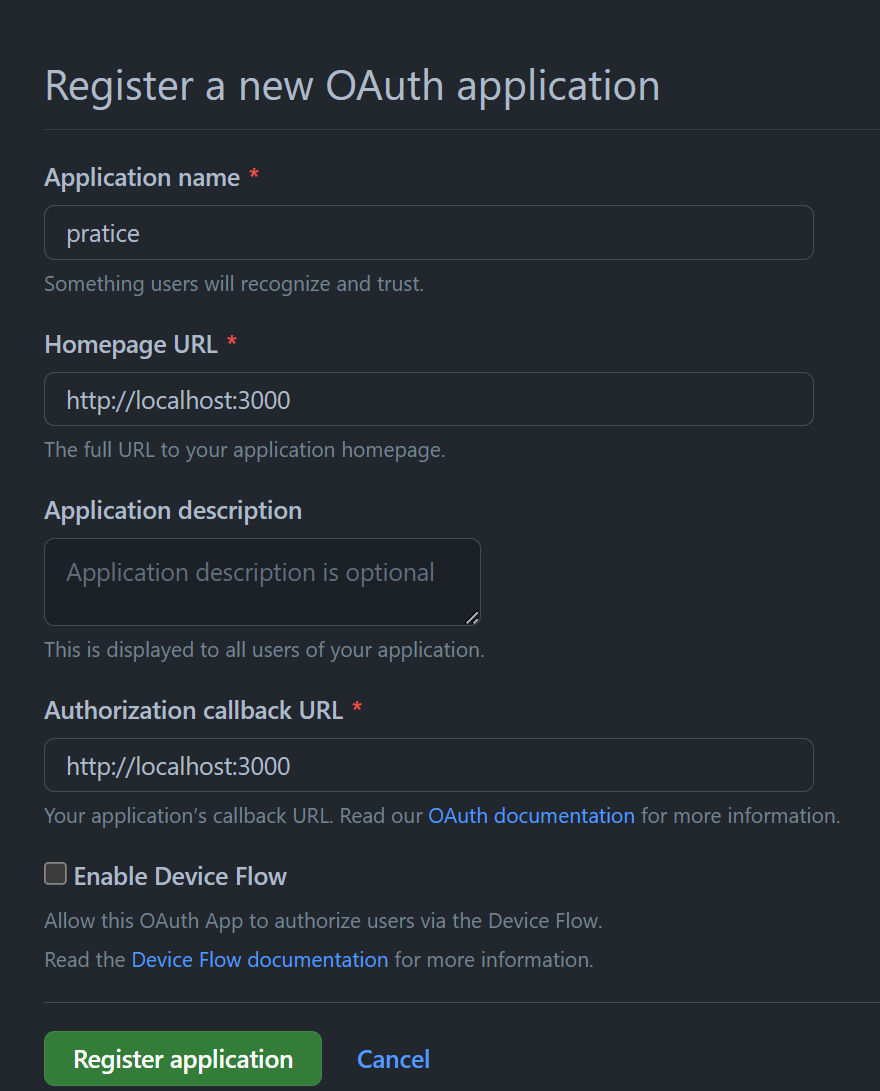
- 그 후, 프로젝트 이름과 OAuth 메커니즘이 인증 과정이 끝난 후 리디렉션으로 다시 돌아올 url주소를 입력합니다.
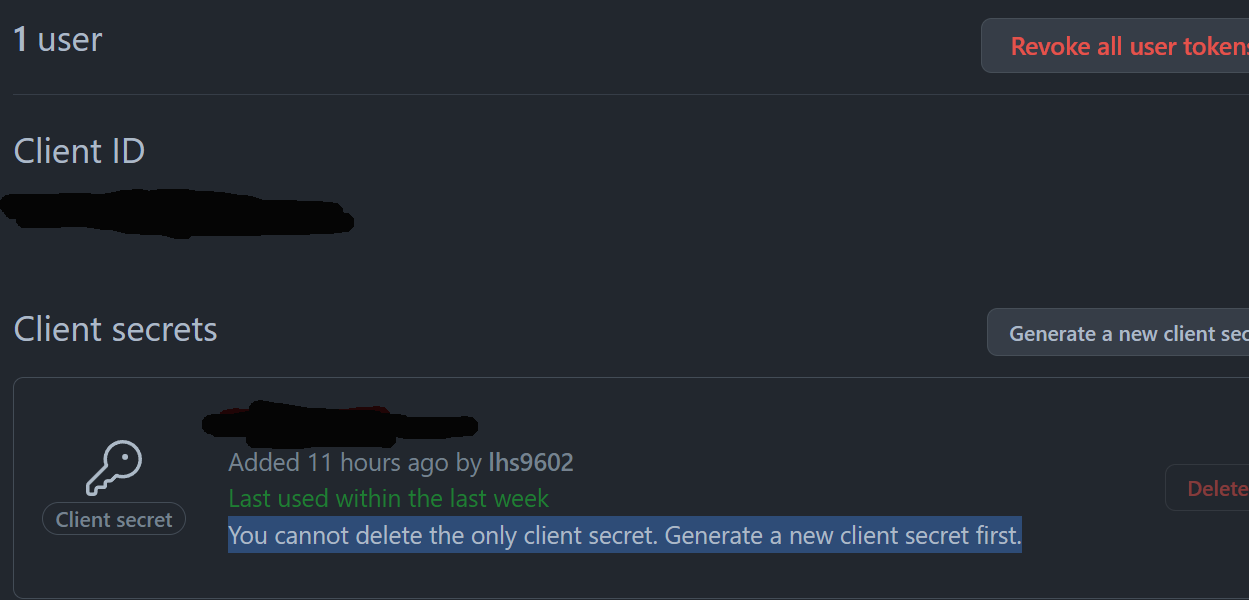
- 등록 이후,Client secrets를 생성하고 Client ID와 함께 서버와 클라이언트에 복사한다.
- 이때,. env 파일로 저장하여 보안을 강화할 수 있다.
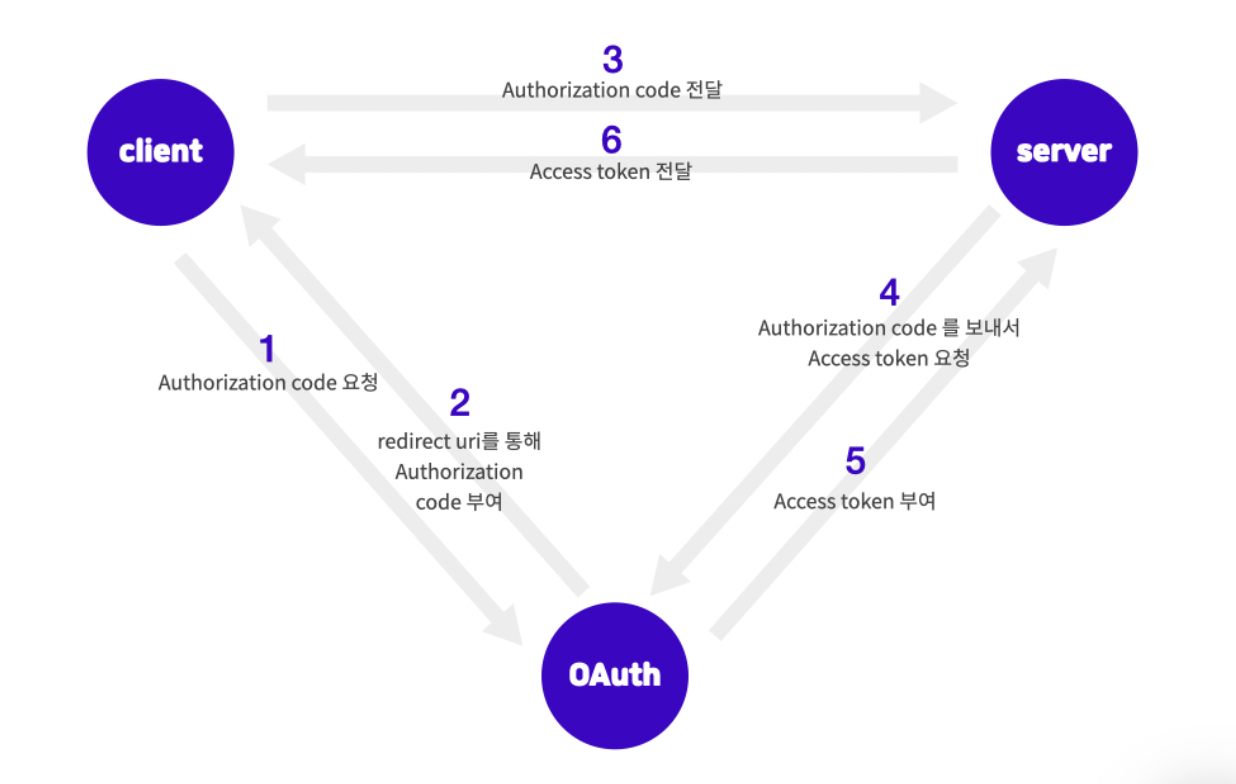
소셜 로그인의 흐름
대략적인 흐름은 아래와 같다. 단, 밑의 과정이 전부 끝나고 마지막에 로컬 서버와 github 저장소 서버에서 client에 유저 데이터를 전송한다.
Login.js(클라이언트)
const CLIENT_ID = process.env.REACT_APP_CLIENT_ID;

  const loginRequestHandler = () => {
    return window.location.assign(
      `https://github.com/login/oauth/authorize?client_id=${CLIENT_ID}`
    );
};- 우선 login에서 location.assign으로 GitHub로 이동합니다. 이때, 아까 github에서 받은 CLIENT_ID도 같이 포함시킵니다.
- 그 후,GitHub 아이디로 로그인을 하고, GitHub에 요청을 보내 Authorization code를 획득합니다.
- OAuth 인증이 완료되면 authorization code와 함께 github에 등록된 callback url로 리디렉션 합니다.
App.js(클라이언트)
useEffect(() => {
    const url = new URL(window.location.href);
    const authorizationCode = url.searchParams.get('code');
    if (authorizationCode) {
      getAccessToken(authorizationCode);
    }
}, []);- 리디렉션이 발생하면서 화면이 다시 렌더링이 되고, App.js의 useEffect가 실행됩니다.
- 이때, 주소에 authorization code가 같이 들어와 있으므로, window.location.href로 현재 url를 저장하고 searchParams로 authorization code가 들어있는 code라는 params를 추출합니다.
- 맨 처음 랜더링 될 때는 authorization code가 존재하지 않아 if문이 작동하지 않았지만, 리디렉션 이후에는 authorization code가 존재하기에 토큰을 요청하는 함수가 실행됩니다.
  const getAccessToken = async (authorizationCode) => {
    await axios
    .post("http://localhost:4000/callback",{authorizationCode})
    .then((token)=> {
      setAccessToken(token.data.accessToken);
      setIsLogin(true);
} );- 해당 함수는 localhost 4000번에서 실행된 서버의 callback에 post 요청을 보냅니다.
- 이때, authorization code를 함께 넘겨줍니다.
- 이후, 리턴된 데이터에서 토큰을 상태에 저장하고, props로 Mypage에 전달합니다.
callback.js(서버)
 const result = await axios({
      method: 'post',
      url: `https://github.com/login/oauth/access_token`,
      headers: {
        accept: 'application/json',
      },
      data: {
        client_id: CLIENT_ID,
        client_secret: CLIENT_SECRET,
        code: req.body.authorizationCode,
      },
    });
    const accessToken = result.data.access_token;
return res.status(200).send({ accessToken });- App에서 호출한 callback은 다시 github에 authorization code와 CLIENT_ID, CLIENT_SECRET를 각각 위의 양식처럼 post로 토큰을 요청합니다.
- 전달된 토큰은 다시 클라이언트로 상태 200과 함께 보내줍니다.
Mypage(클라이언트)
const fetchData =  async () => {
  await axios
  .post("http://localhost:4000/userinfo",{accessToken})
  .then((res)=> {
    const { githubUserData, serverResource } = res.data
    setGithubUser(githubUserData);
    setServerResource(serverResource);
  } );
}
  useEffect(() =>{
    if(accessToken){
    fetchData();
    }
}, []);- props로 받은 토큰과 함께 서버의 userinfo에 post를 보내 유저데이터를 요청합니다.
- 받은 유저데이터는 github의 유저데이터와 로컬서버의 데이터로, 각각 상태에 저장합니다.
userInfo.js(서버)
const { accessToken } = req.body;

return axios
    .get('https://api.github.com/user', {
      headers: {
        Authorization: `token ${accessToken}`,
      },
    })
    .then((res) => {
      return res.data})
    .then((githubUserData) => {
      res.send({ githubUserData, serverResource });
})- Mypage에서 받아온 토큰으로 github의 api에 유저 정보를 요청합니다.
- 이후 github과 로컬 서버의 유저 데이터를 다시 반환합니다.
Mypage(클라이언트)
  const logoutHandler = async() => {
    await axios
    .delete("http://localhost:4000/logout",{data:{accessToken}})
    .then((res)=>{
      setAccessToken('');
      setServerResource(null);
      setGithubUser(null);
    })
};- 마지막으로 로그아웃 처리입니다.
- 로그아웃을 하면 우선 서버의 logout으로 delete요청을 하여 서버에 있는 액세스 토큰을 삭제합니다.
- 이때, delete는 post와 달리 명시적으로 data속성을 선언해서 보내야 합니다.
- 마지막으로 클라이언트에 있는 토큰과 유저테이터를 초기화시킵니다.
logout.js(서버)
  const { accessToken } = req.body;
  axios
    .delete(`https://api.github.com/applications/${CLIENT_ID}/token`, {
      data: {
        access_token: accessToken,
      },
      auth: {
        username: CLIENT_ID,
        password: CLIENT_SECRET,
      },
    })
    .then(() => {
      res.status(205).send('Successfuly Logged Out');
})- 로그아웃을 위해 api에 등록된 토큰도 제거하도록 delete를 요청합니다.
- 여기서 주의할 점은 각 데이터를 위와 같은 양식으로 요청해야 합니다.
'개발 > node, express' 카테고리의 다른 글
| 데이터베이스에 데이터 저장하기 (0) | 2023.05.07 |
|---|---|
| MongoDB (0) | 2023.05.06 |
| OAuth (0) | 2023.05.04 |
| 액세스 토큰과 리프레시 토큰 (0) | 2023.05.03 |
| 해싱과 토큰 (0) | 2023.05.03 |
댓글